How to Set Up an Assistant to Call New Leads (AI Dialer)
Step 1: Create a Voice Agent
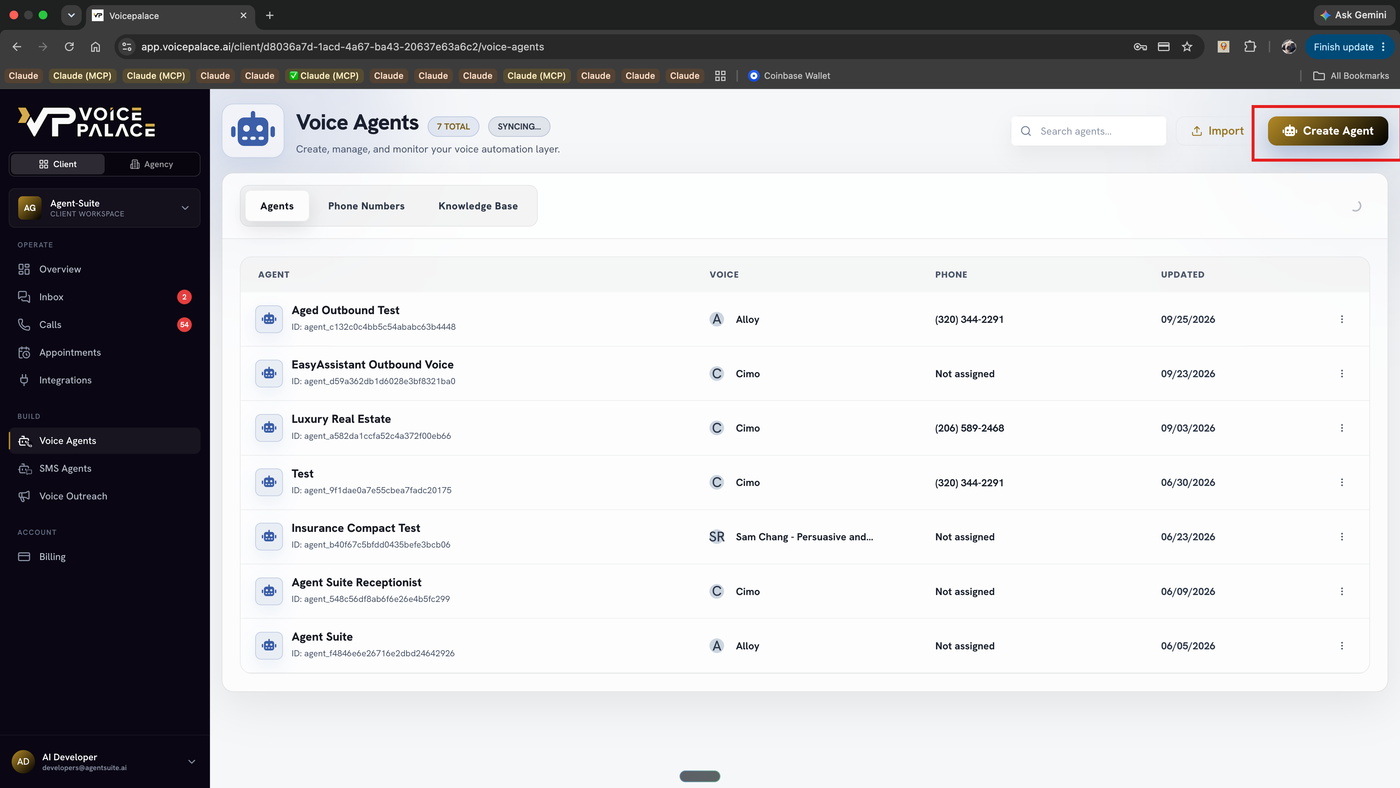
From your VoicePalace dashboard, click Voice Agents in the left-hand menu under BUILD.
Click Create Agent (top right) to start a new one, or select an existing agent from the list if you want to use one you've already built for outbound lead calls.
Step 2: Connect a Phone Number
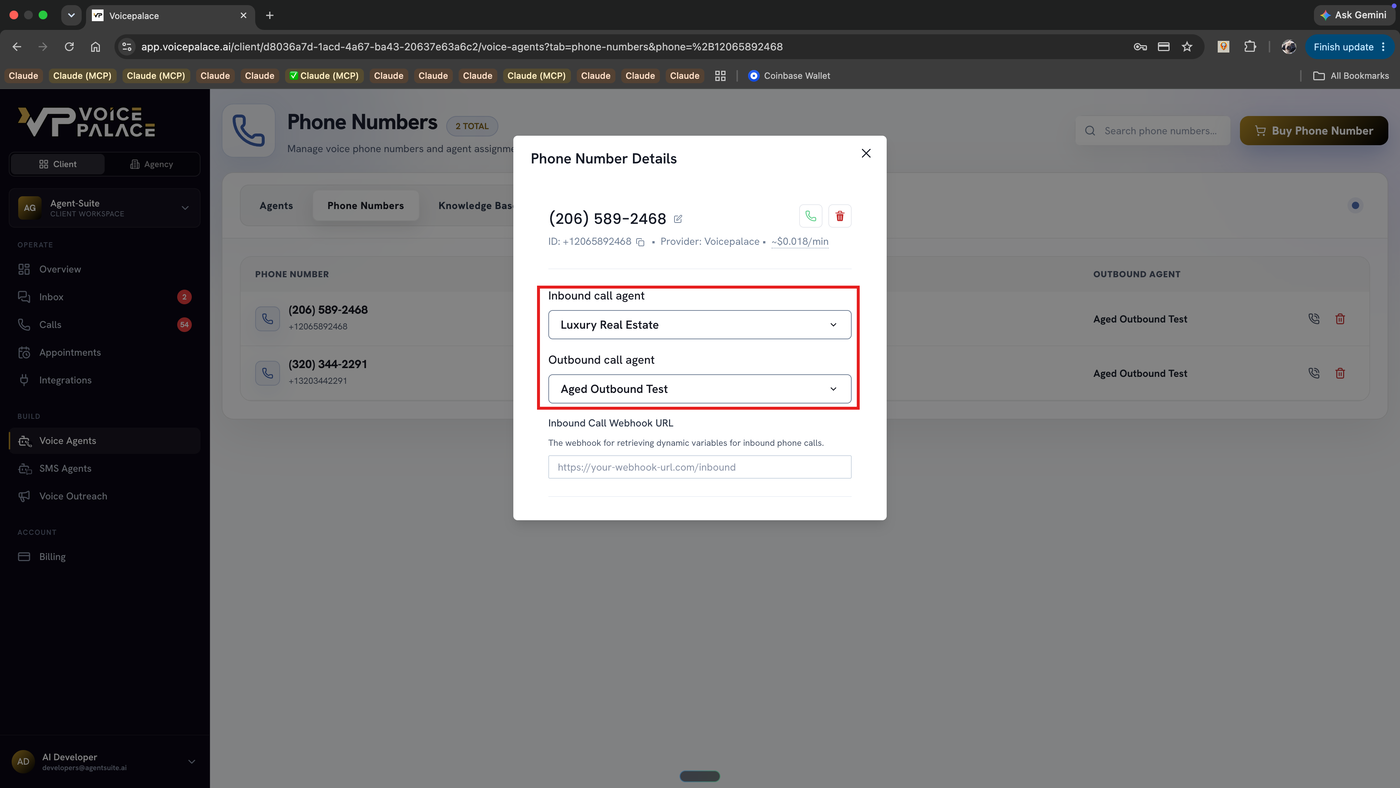
Click the Phone Numbers tab.
Click Buy Phone Number if you need a new one, or click an existing number from the list to reassign it.
In the Phone Number Details panel, set the Inbound call agent and Outbound call agent to the agent you just created.
Close the panel; it syncs automatically.
Step 3: Set Up a Workflow in GoHighLevel
In GHL, go to Workflows and create (or open) a workflow.
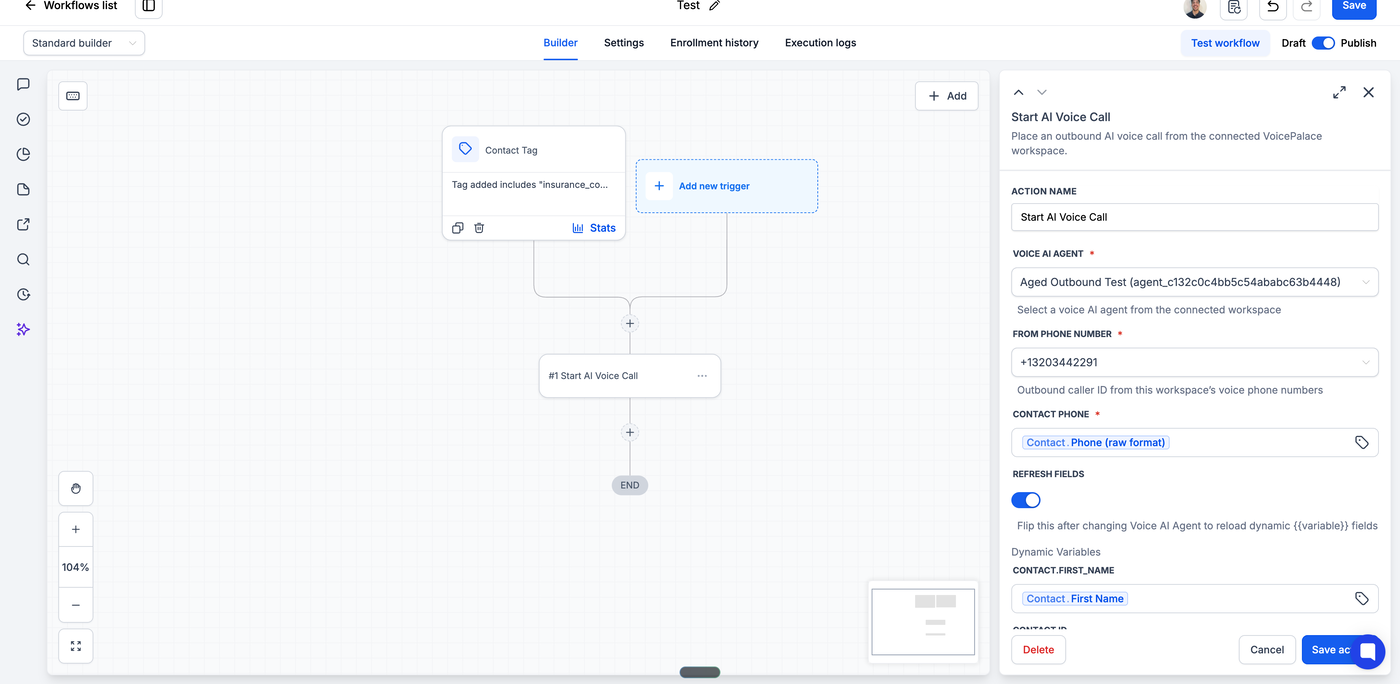
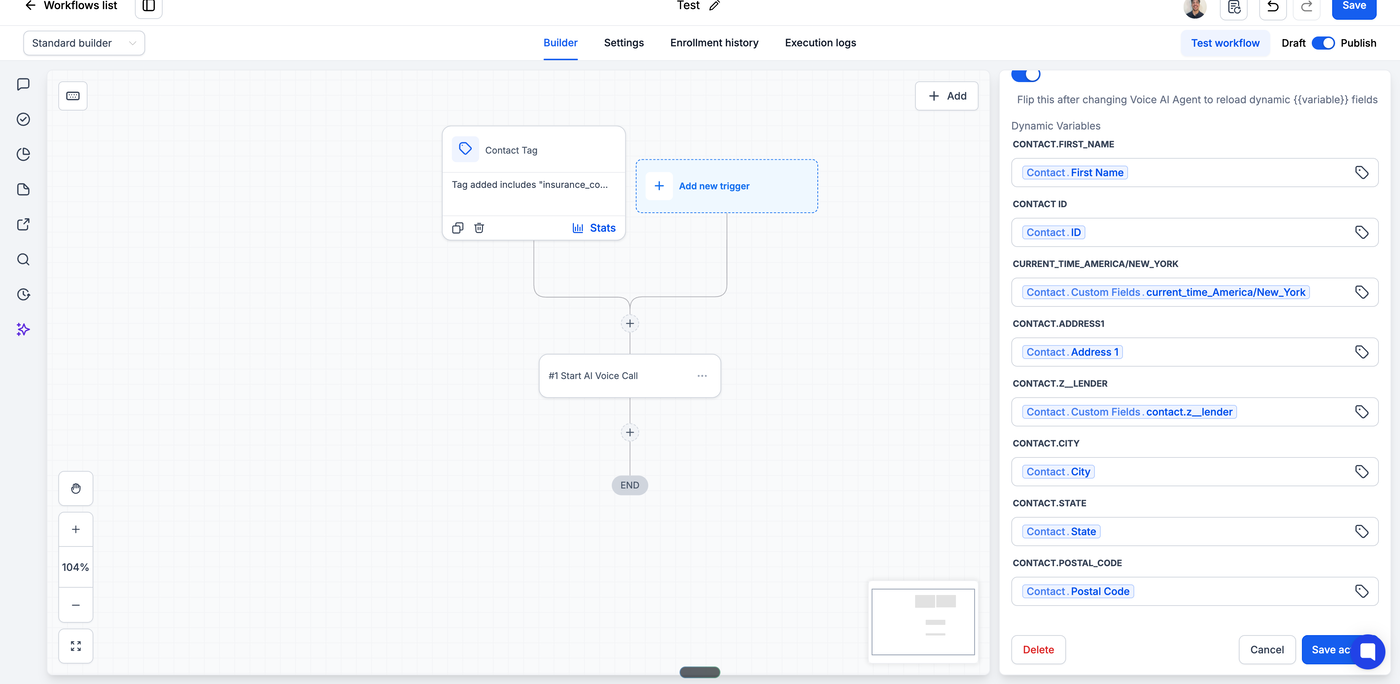
Set the trigger to Contact Tag — e.g. "Tag added includes [your trigger tag]".
Add the Start AI Voice Call action — it places an outbound AI voice call from your connected VoicePalace workspace.
Select your Voice AI Agent from the dropdown, and do the same for From Phone Number.
Contact Phone and Contact First Name are already mapped by default — leave those unless your form fields differ.
Save the action, then publish the workflow.
Step 5: Confirm Your Dynamic Variables
In the Start AI Voice Call action, scroll to Dynamic Variables.
Confirm each one (Contact.First Name, Contact.ID, etc.) is mapped to the correct GHL field — these get pulled into your agent's prompt wherever it references that variable.
If you change the Voice AI Agent or the prompt calls for a new variable, flip Refresh Fields to reload the list.
Double-check the variable names here actually match what your prompt references. If they don't line up exactly, the agent will read the literal unresolved tag out loud on the call instead of the real value — that's a real bug, not a hypothetical one.
Step 6: Test the Dialer
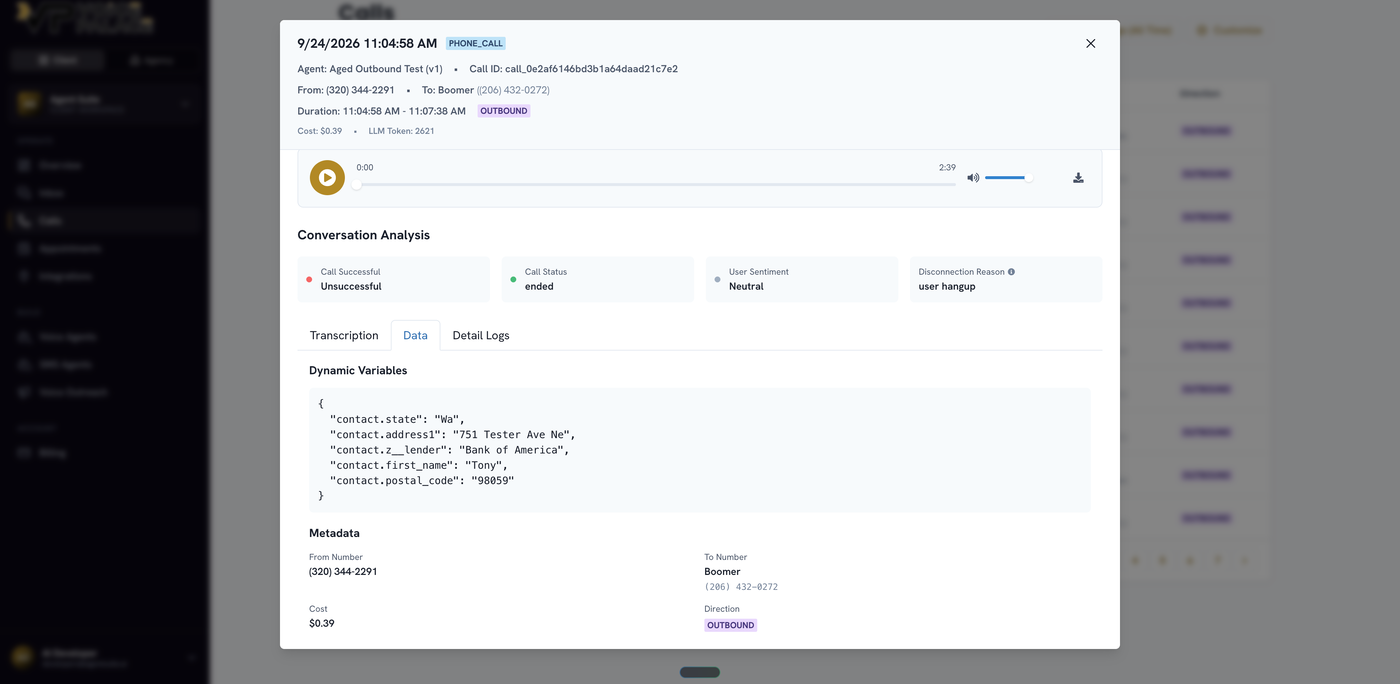
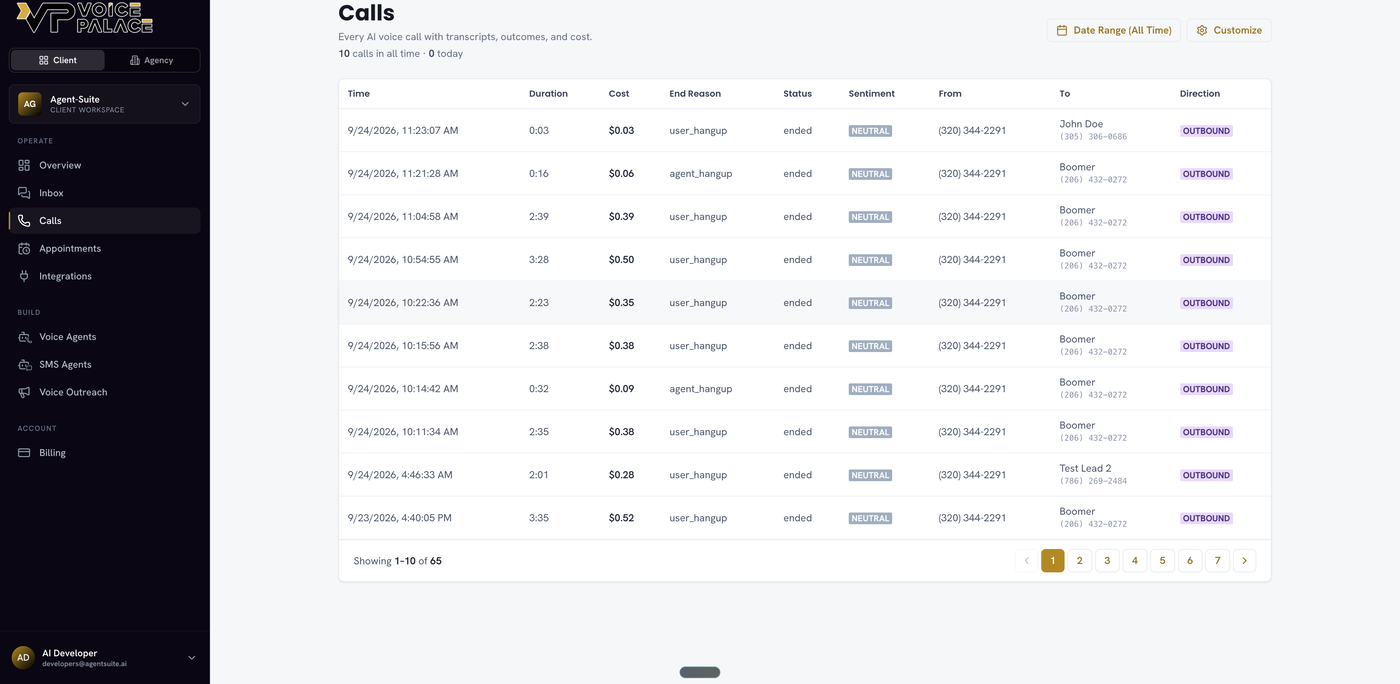
Add a test lead into your system, apply your trigger tag (or fire the workflow manually), and let the assistant call. Once it ends, head to Calls in the left sidebar — every call you've placed shows up here with duration, cost, end reason, sentiment, and more. Click into your test call to open it.
Step 7: Review the Results
The Conversation Analysis panel at the top gives you the quick read — Call Successful, Call Status, User Sentiment, Disconnection Reason — plus a written Summary. Open the Transcription tab to read the full conversation, the Data tab to confirm your dynamic variables actually resolved (worth checking even on a call that didn't end in a booking, like below), and the Detail Logs tab to confirm your tools fired